Logic Pro Autotune: A Step-by-Step Guide to Perfecting Your Vocals
In this comprehensive guide on Logic Pro Autotune, we'll explore how to effectively use pitch correction to enhance your vocal tracks. Whether you're aiming for subtle adjustments or the iconic T-Pain effect, this tutorial will provide you with all the necessary steps to achieve professional-sounding vocals.
Step 1: Understanding Autotune 🎤
Autotune, a pitch correction tool, is essential in modern music production. It offers real-time adjustments, allowing vocalists to achieve desired pitches effortlessly. Whether you're aiming for subtle corrections or the iconic autotune sound, understanding its functionalities is crucial.
This plugin can correct slight pitch inaccuracies, helping vocal performances shine. It's also versatile enough for creative applications, such as crafting the signature T-Pain effect. Mastering this tool can elevate the quality of your tracks significantly.
Key Features
- Real-time Pitch Correction: Adjusts vocals as they are recorded.
- Creative Effects: Allows for stylistic pitch shifts, creating unique vocal textures.
- Versatile Usage: Applicable across various genres and vocal styles.
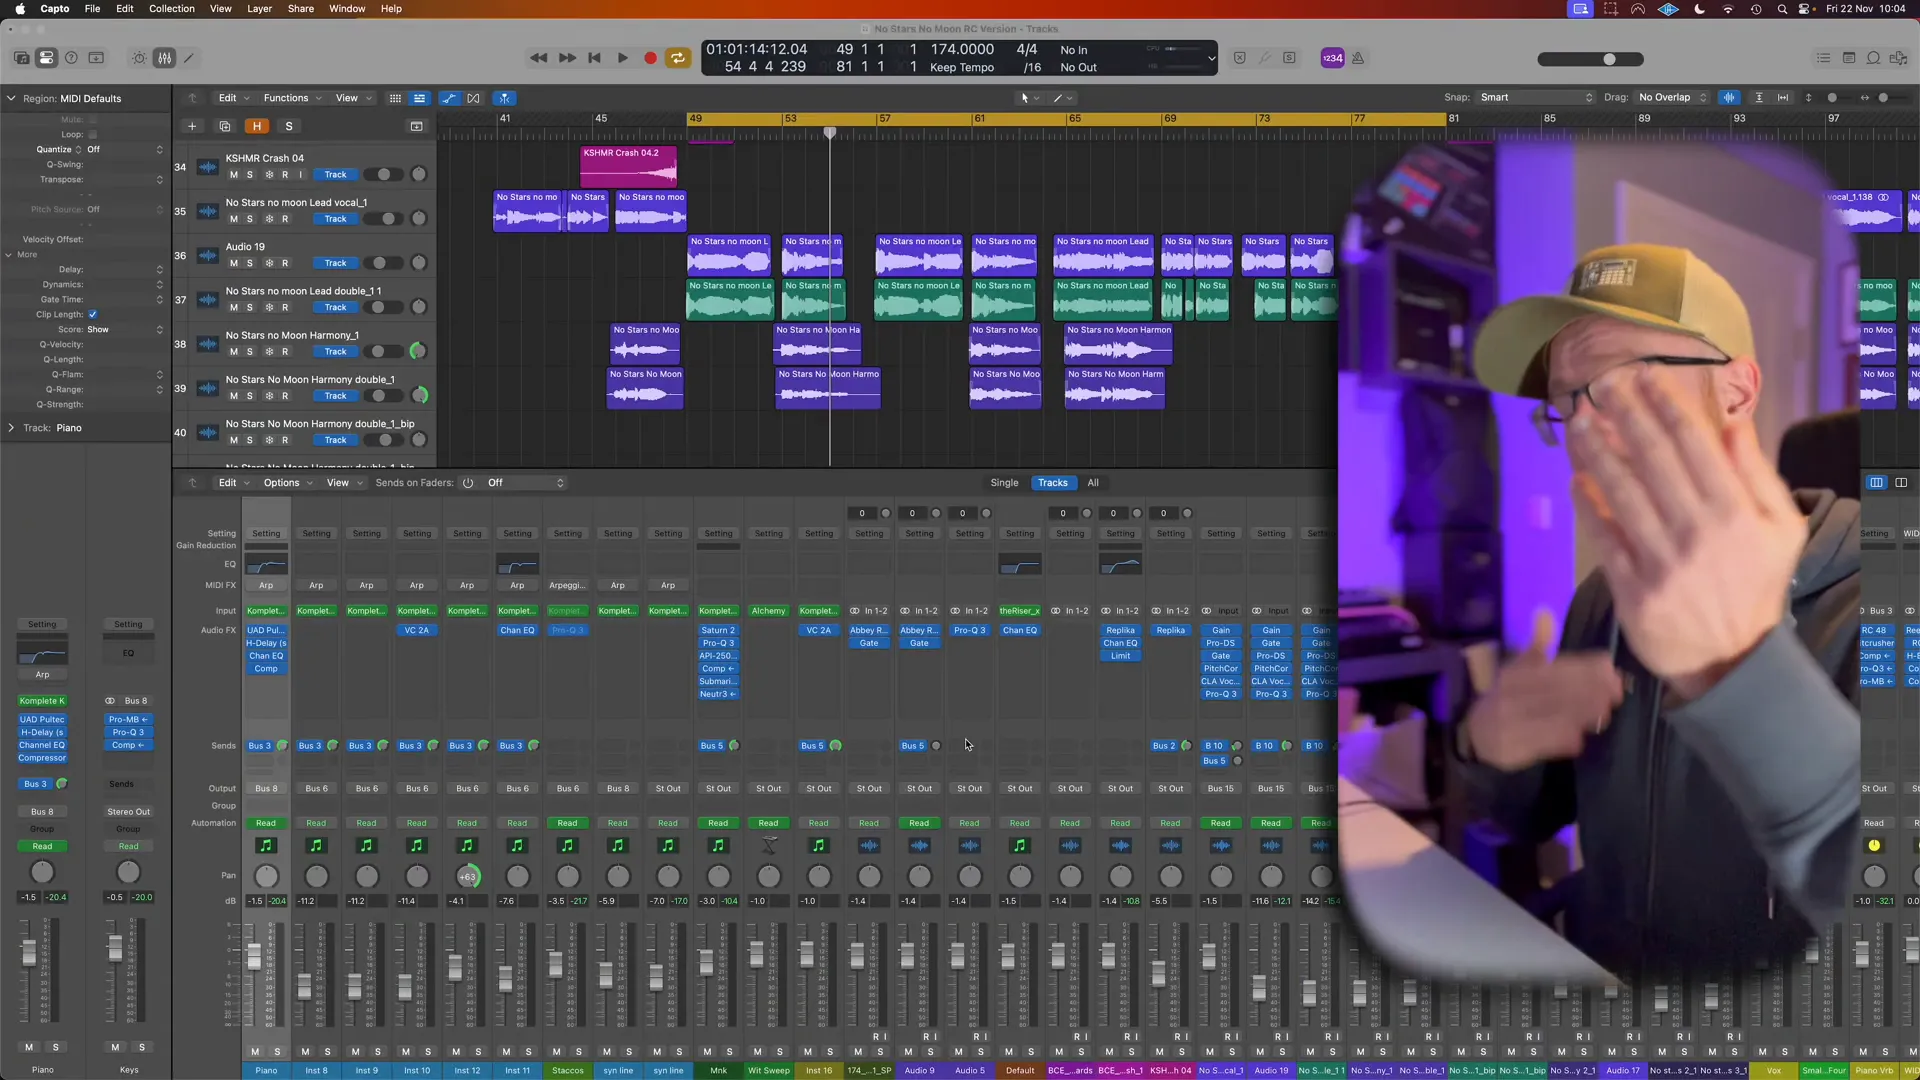
Step 2: Choosing Your Track Example 🎶
Selecting the right track is vital for demonstrating the effectiveness of Logic Pro Autotune. Choose a song with a clear lead vocal and harmonies, as this will showcase the plugin's capabilities best. A track with both strong and subtle vocal elements will allow for a comprehensive demonstration of pitch correction techniques.
In this guide, I will use a track featuring a main lead vocal, backing vocals, and ad-libs to illustrate the process. This selection will help highlight how autotune interacts with various vocal elements and enhances the overall sound.
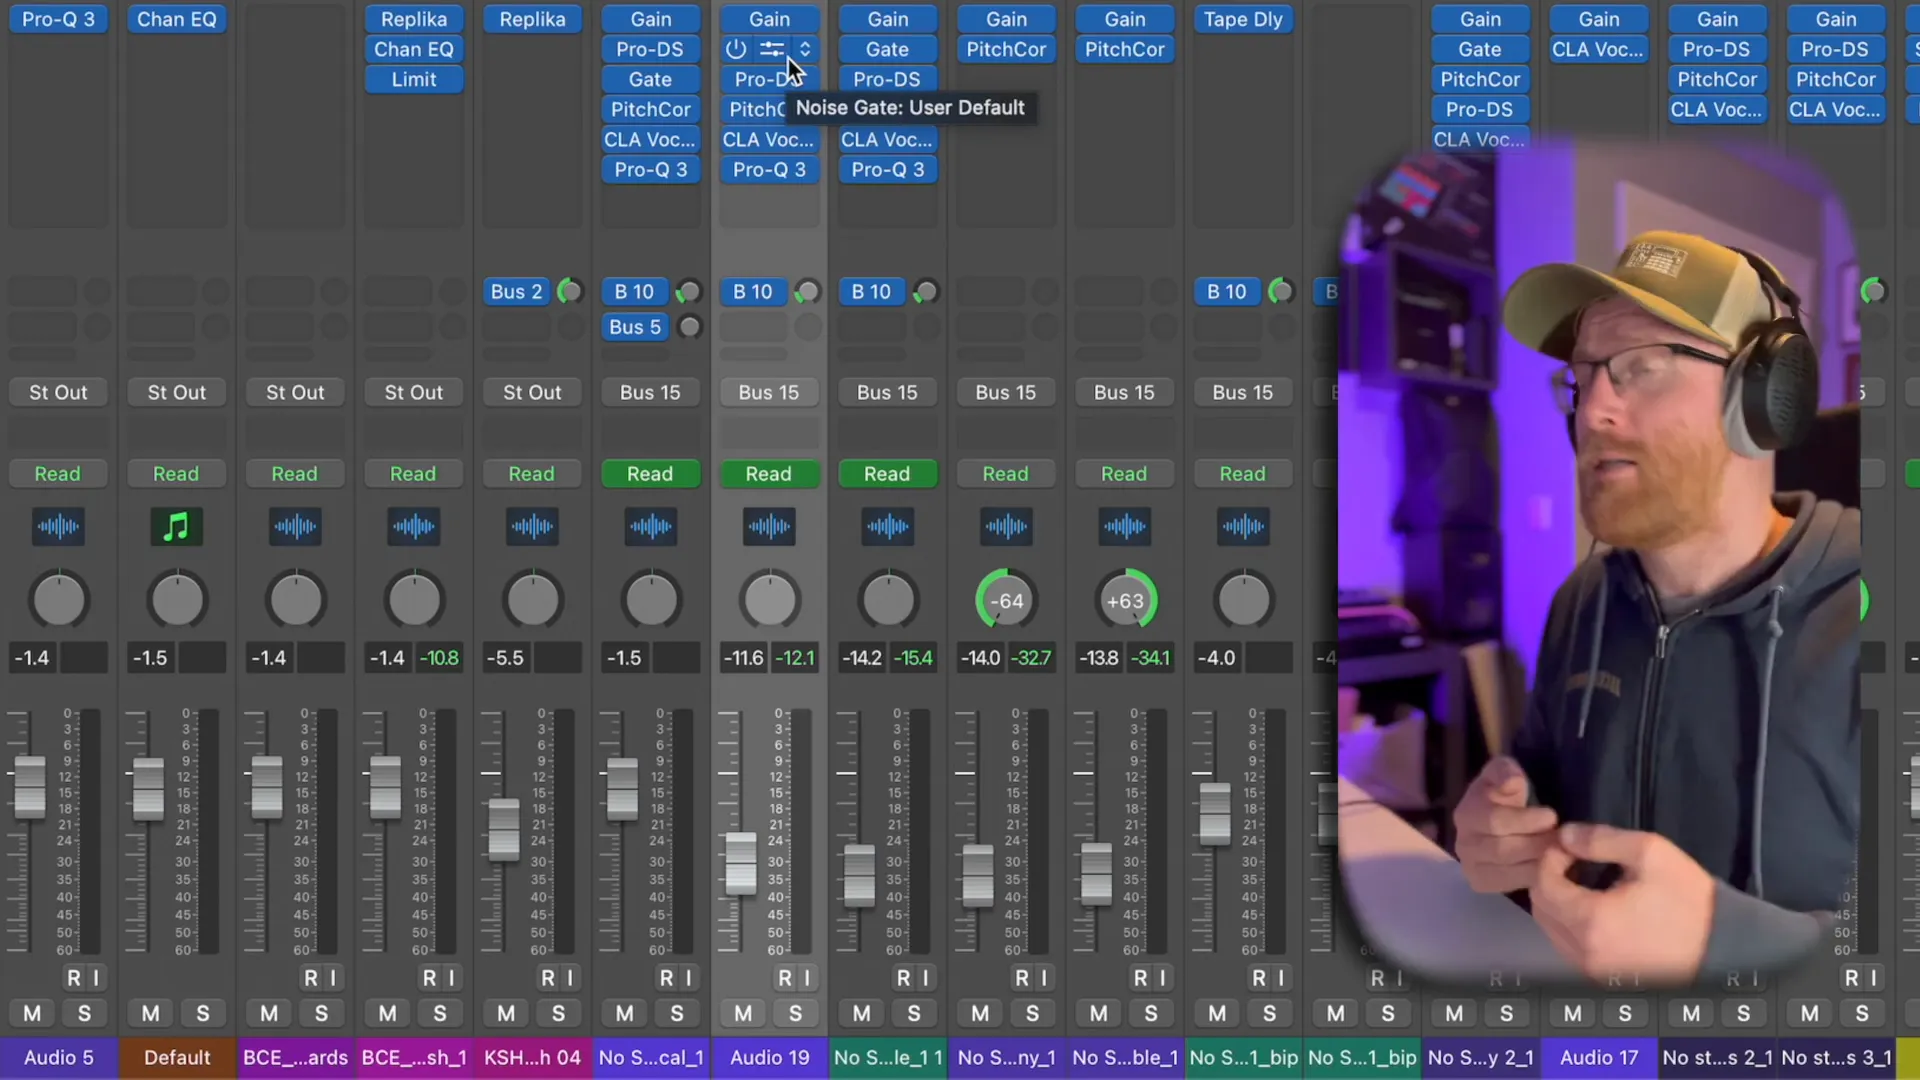
Step 3: Setting Up Your Plugin Chain 🎛️
Establishing an effective plugin chain is key to achieving optimal results with Logic Pro Autotune. Start by placing the pitch correction plugin as the first element in your chain. This positioning allows for initial pitch adjustments before any other processing occurs.
Your chain might look like this:
- Gain Plugin: Control input levels before processing.
- Gate: Remove unwanted noise and clicks.
- De-Esser: Tame sibilance before pitch correction.
- Autotune: Apply pitch correction to the vocal.
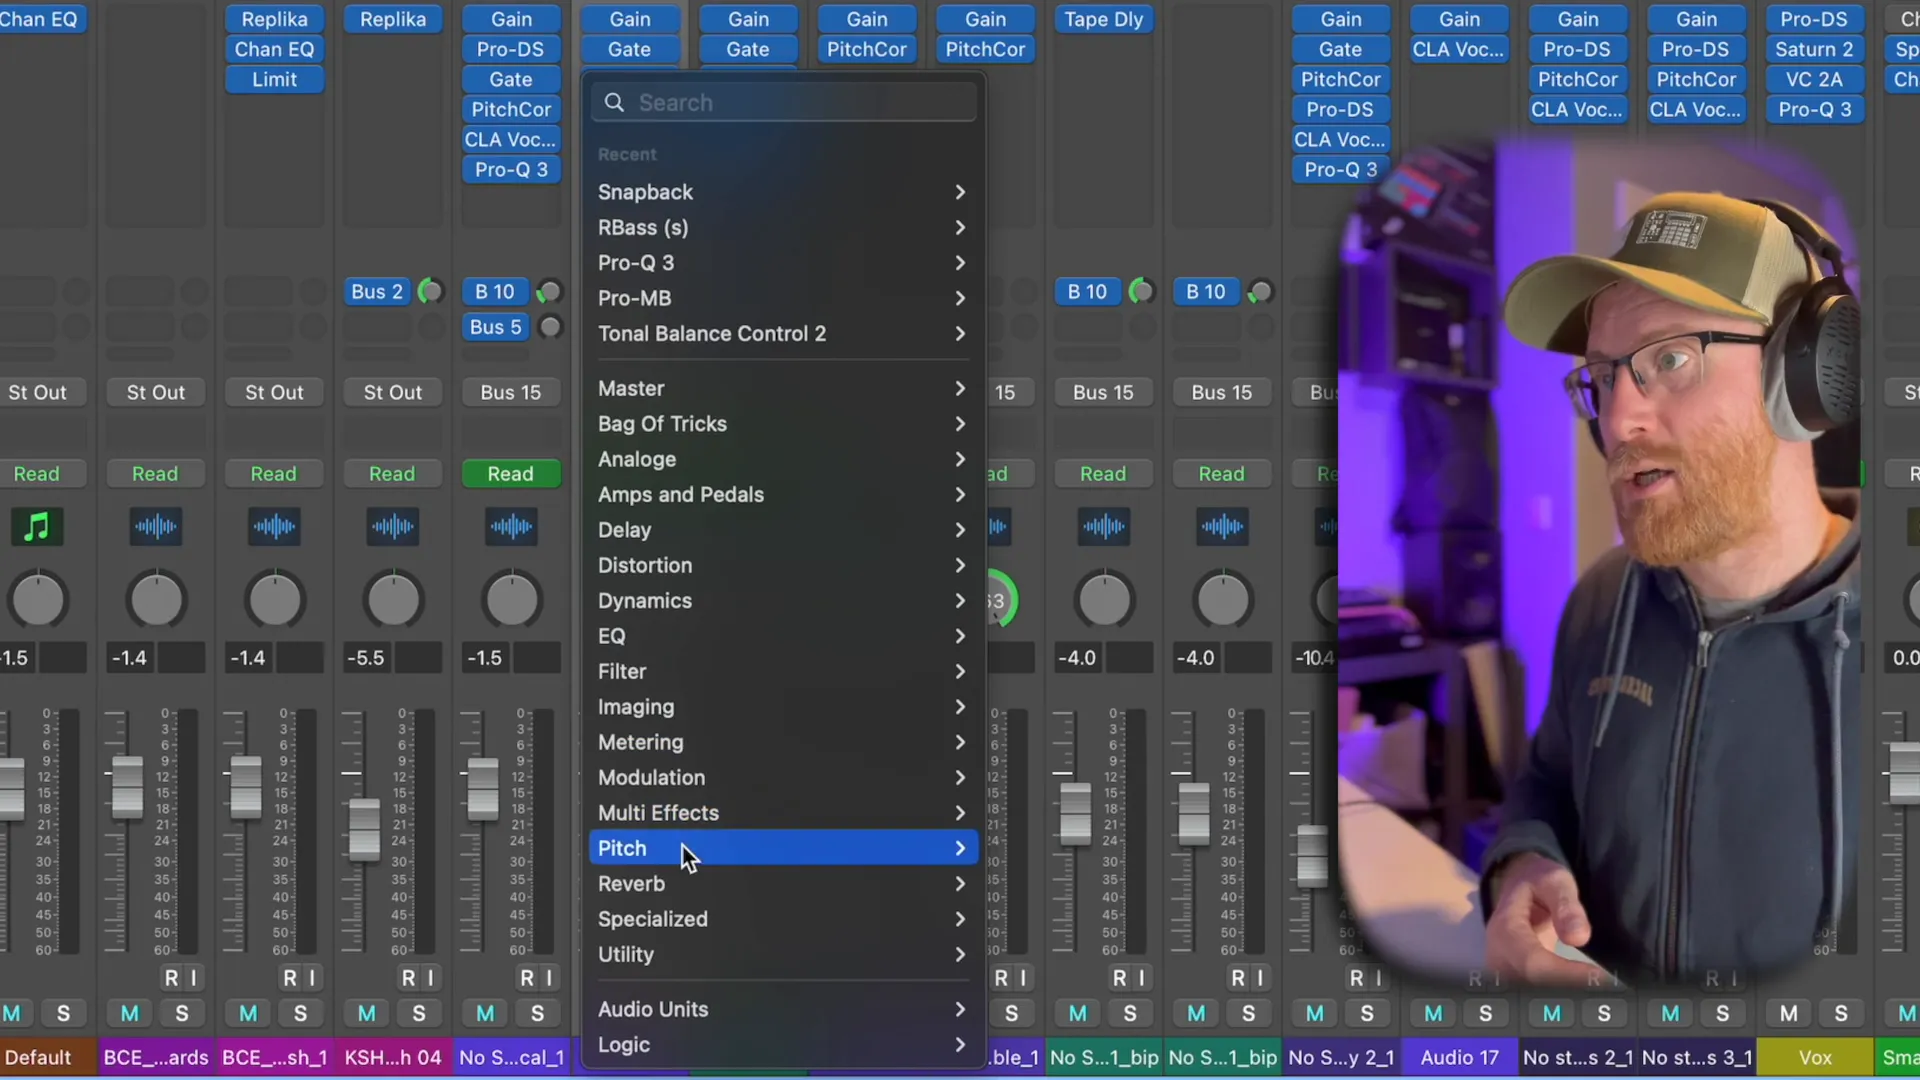
Step 4: Installing Pitch Correction in Logic 🎧
To install the pitch correction plugin in Logic Pro, follow these steps:
- Open your Logic Pro project.
- Navigate to the channel strip of the vocal track.
- Click on the Audio FX button.
- Select Pitch from the dropdown menu, then choose Pitch Correction.
Ensure your plugin is properly configured to begin tuning your vocals effectively. Remember to check for updates frequently to access the latest features and improvements available.
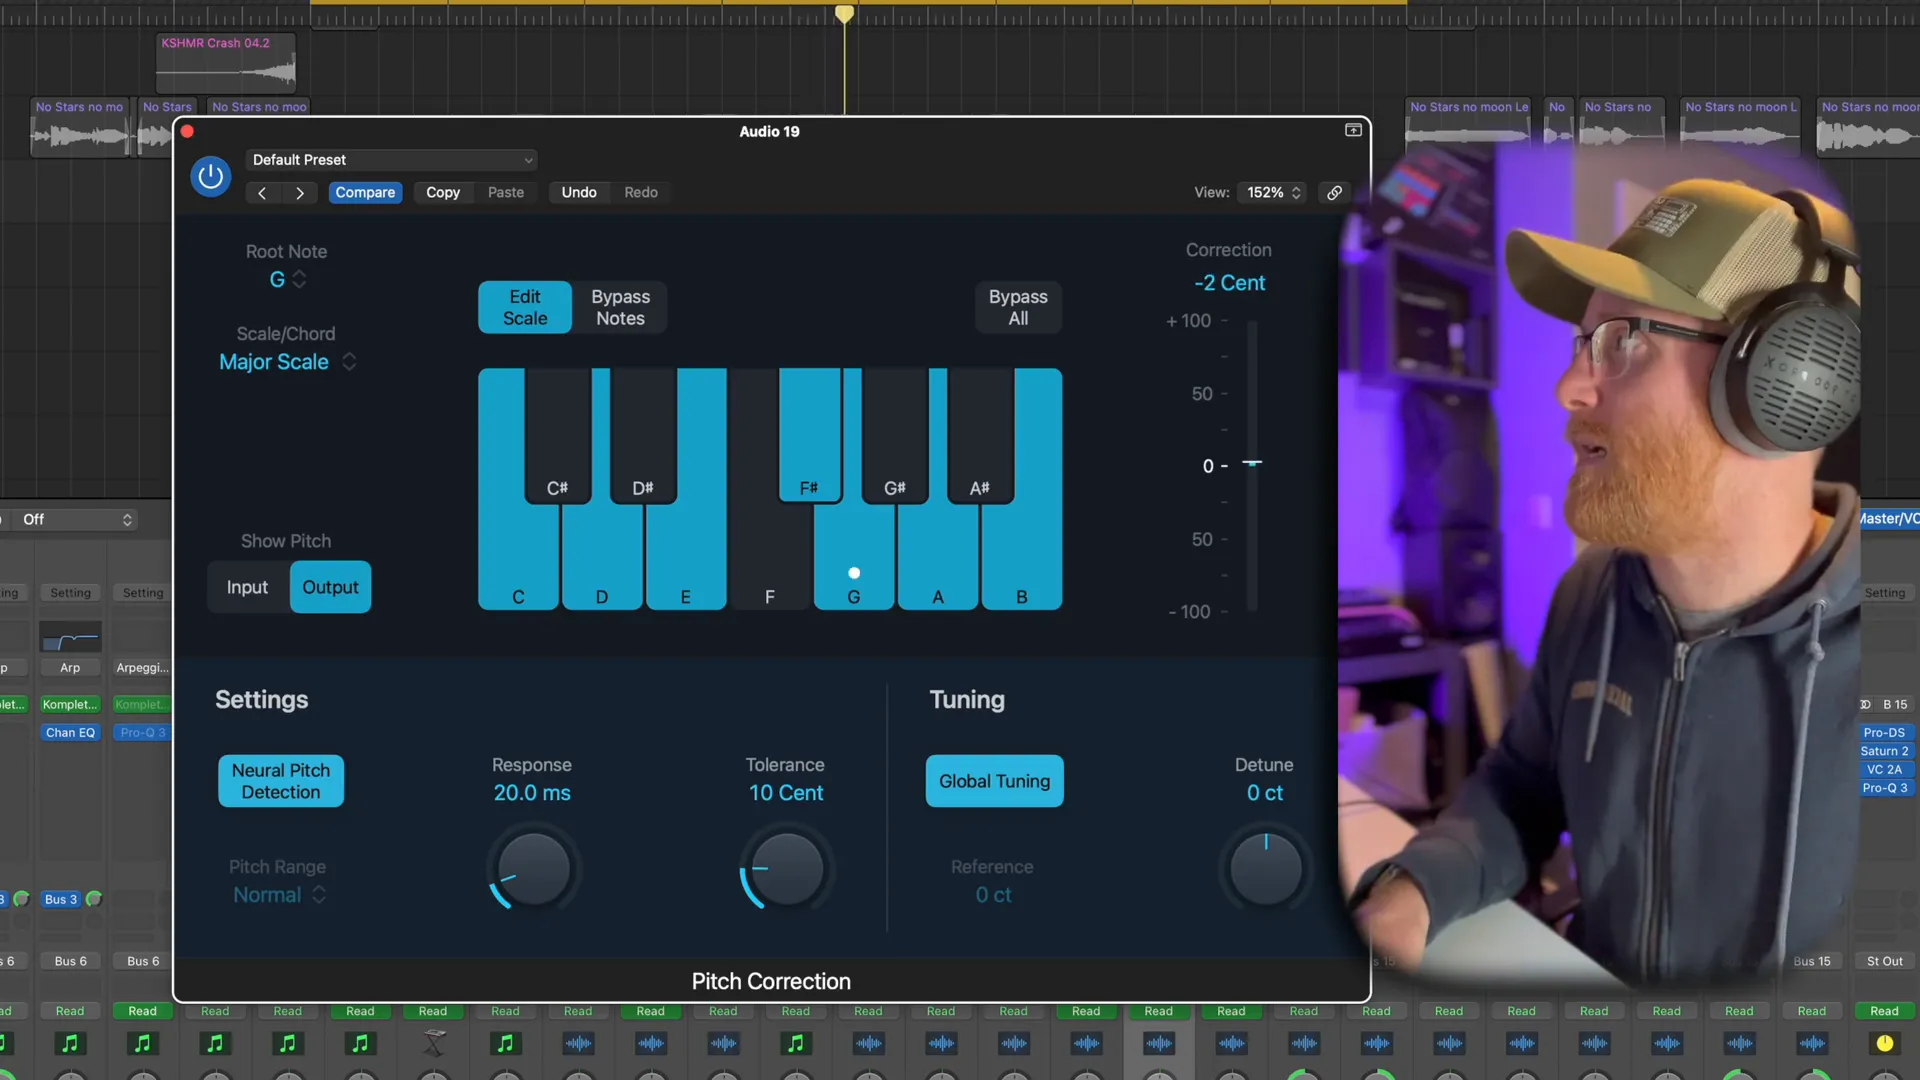
Step 5: Establishing the Key of Your Track 🎼
Before applying pitch correction, it's crucial to set the correct key for your track. This ensures that the plugin accurately detects and corrects pitch discrepancies. For example, if your track is in G major, set the root note to G within the plugin settings.
To define the key:
- Open the pitch correction plugin.
- Locate the Root Note section.
- Select G from the dropdown menu.
- Choose the Major Scale to highlight relevant notes.
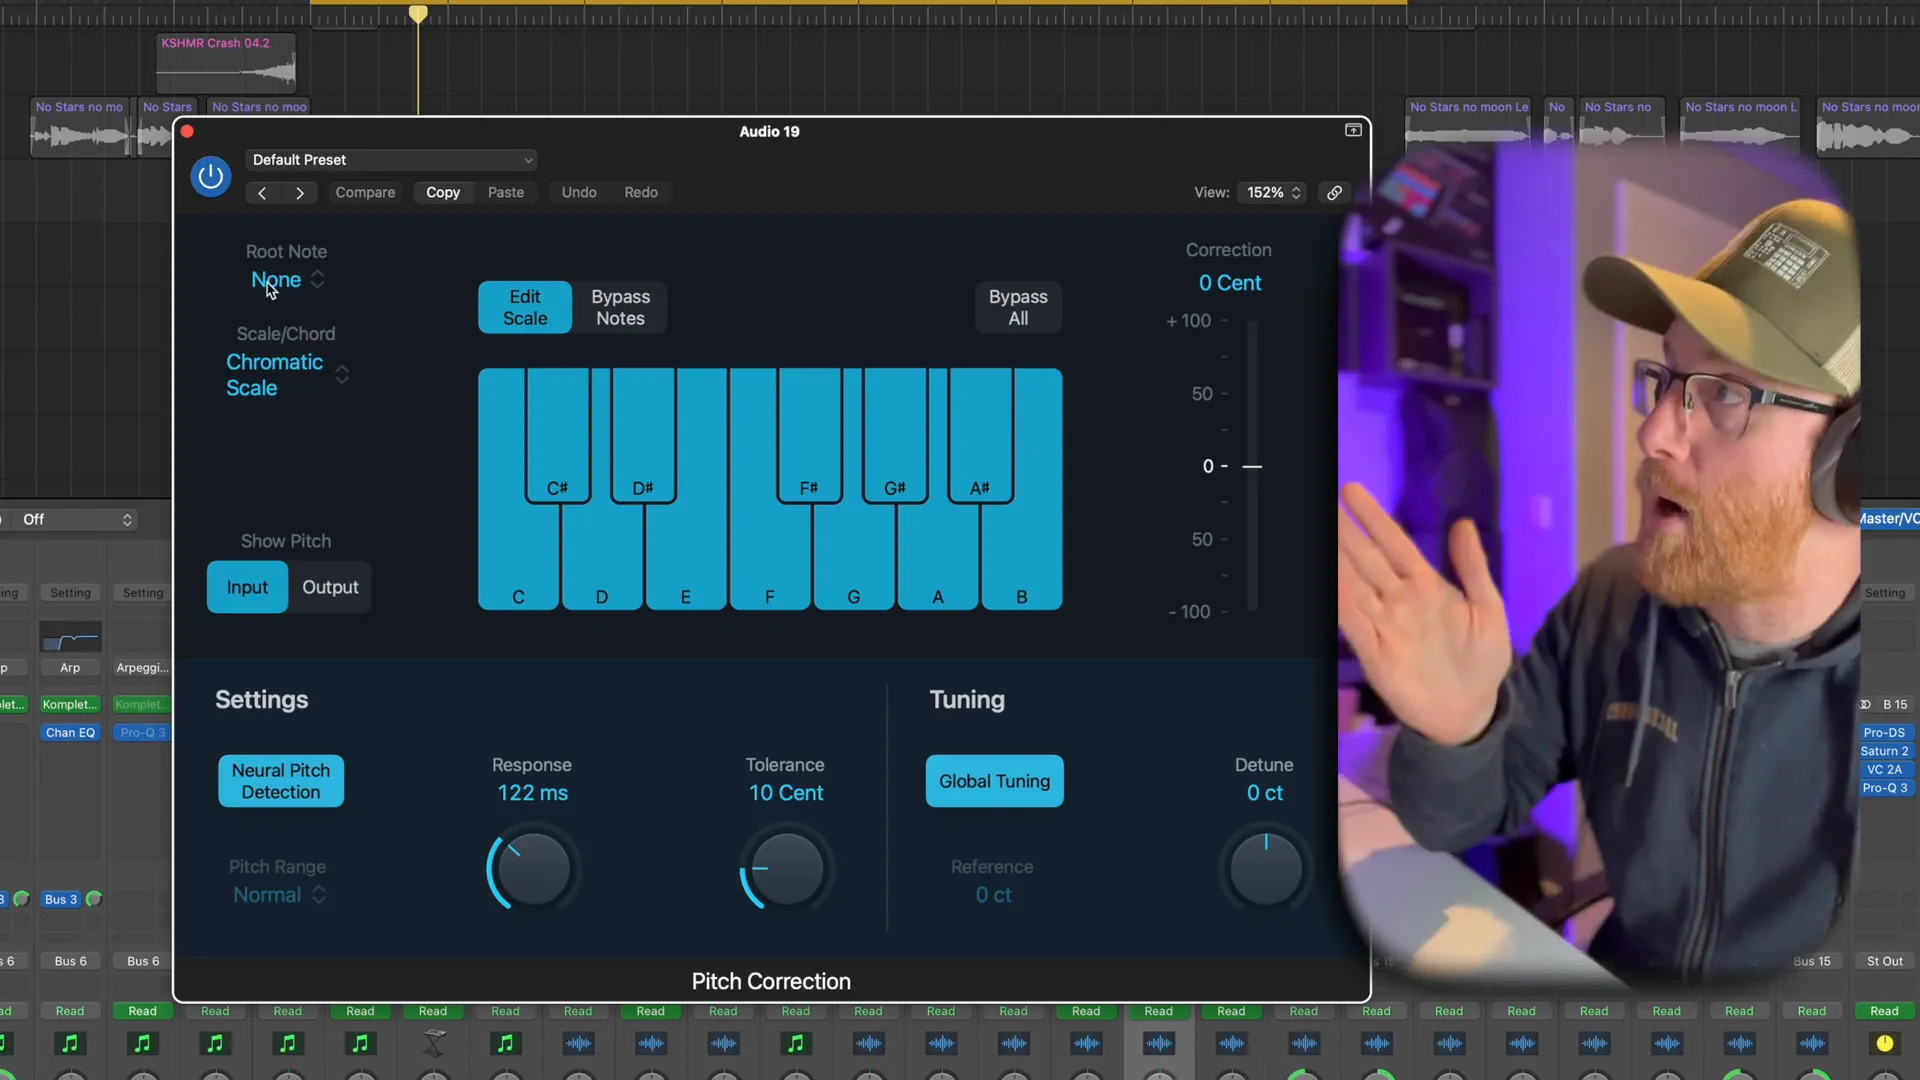
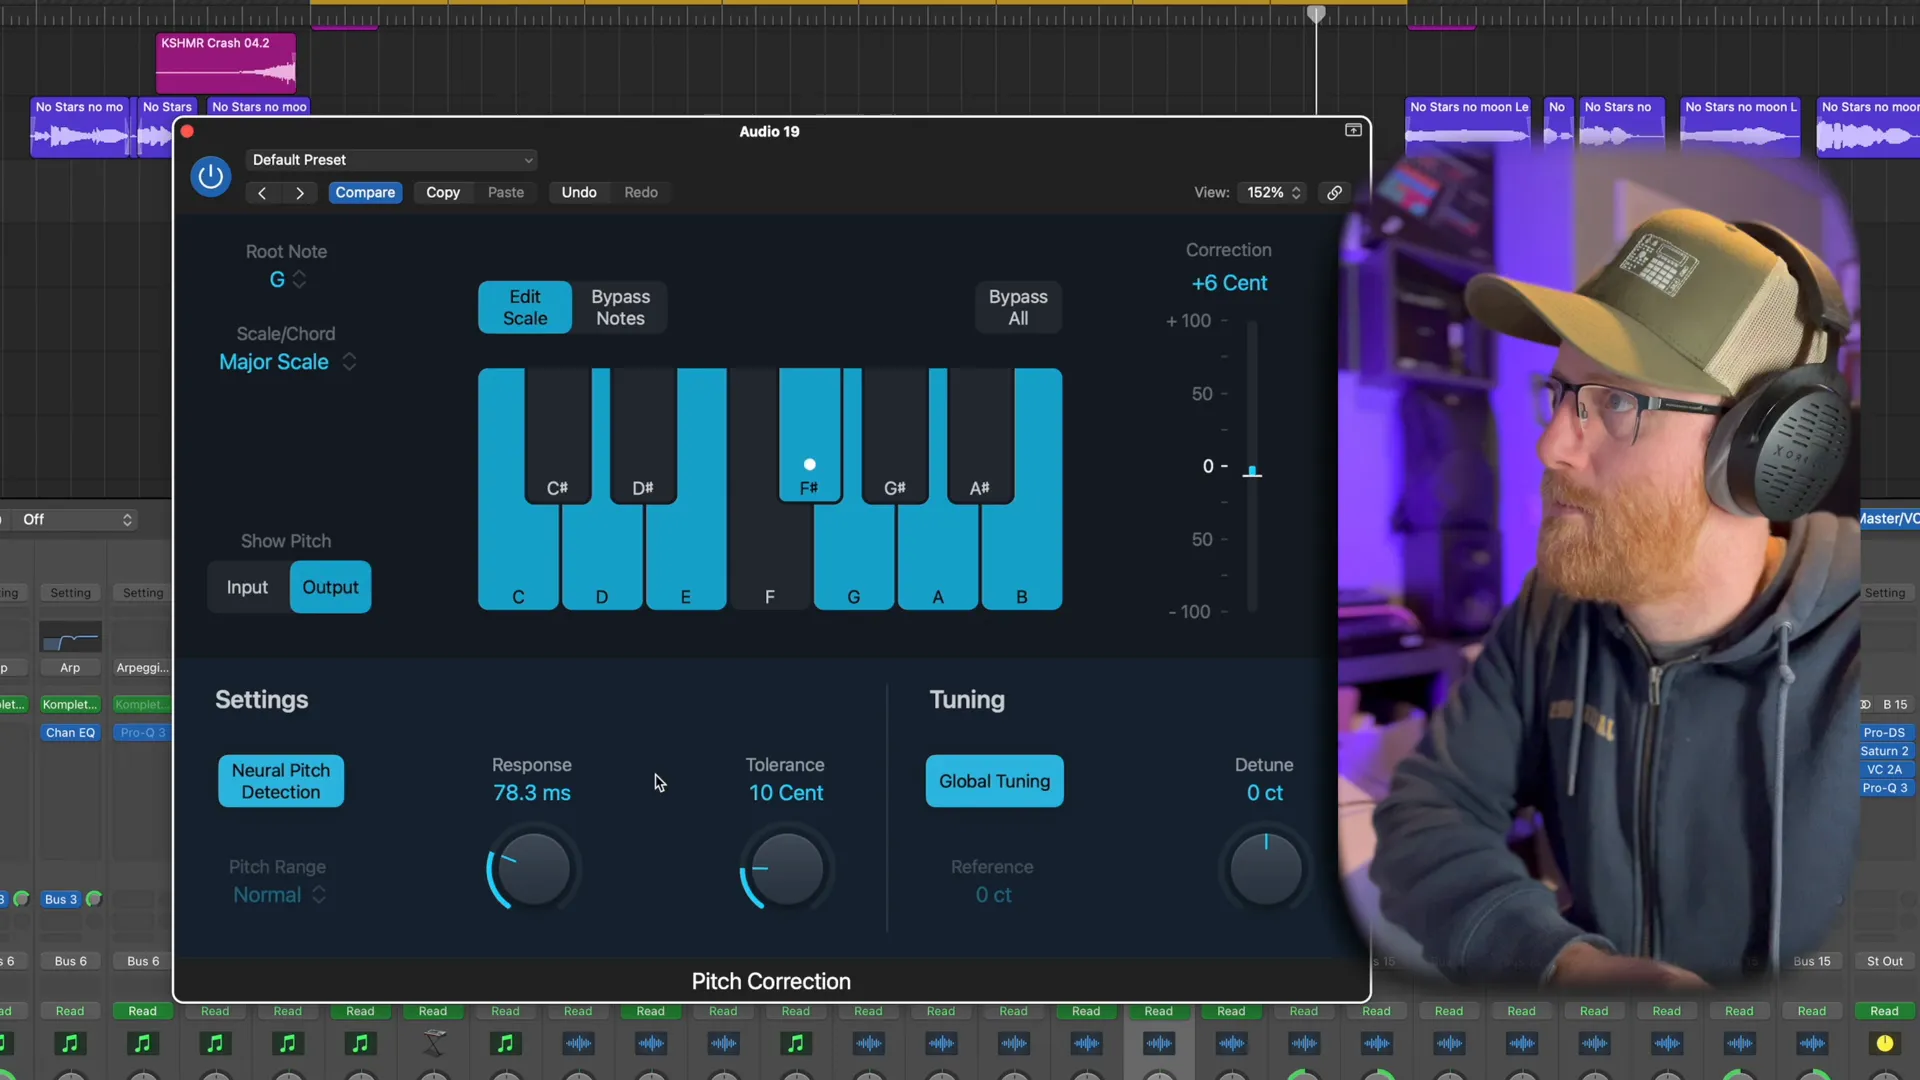
Step 6: Adjusting Response Time and Tolerance ⏱️
Response time and tolerance settings are crucial for achieving natural-sounding pitch corrections. The default response time is set at 122 milliseconds, but this can be adjusted based on the tempo of your track. For faster tempos like 174 BPM, consider shorter response times like 10, 20, or 40 milliseconds.
To adjust these settings:
- Find the Response Time slider in the pitch correction plugin.
- Set it according to your track's BPM for optimal results.
- Adjust the Tolerance to allow for slight pitch variations.
Experiment with these settings to find a balance that retains the natural quality of the vocals while achieving the desired pitch accuracy.
Step 7: Fine-Tuning to Avoid Robotic Sounds 🎶
To achieve a natural sound with Logic Pro Autotune, fine-tuning settings is essential. This involves adjusting the response time and tolerance settings appropriately. A common mistake is setting the response time to zero, which results in a robotic sound.
Instead, set the response time to around 20 milliseconds. This allows for smoother transitions between notes, making the pitch correction feel more organic. Similarly, adjust the tolerance to allow slight fluctuations in pitch, typically around 10 cents. This creates a natural ebb and flow in the vocal performance.
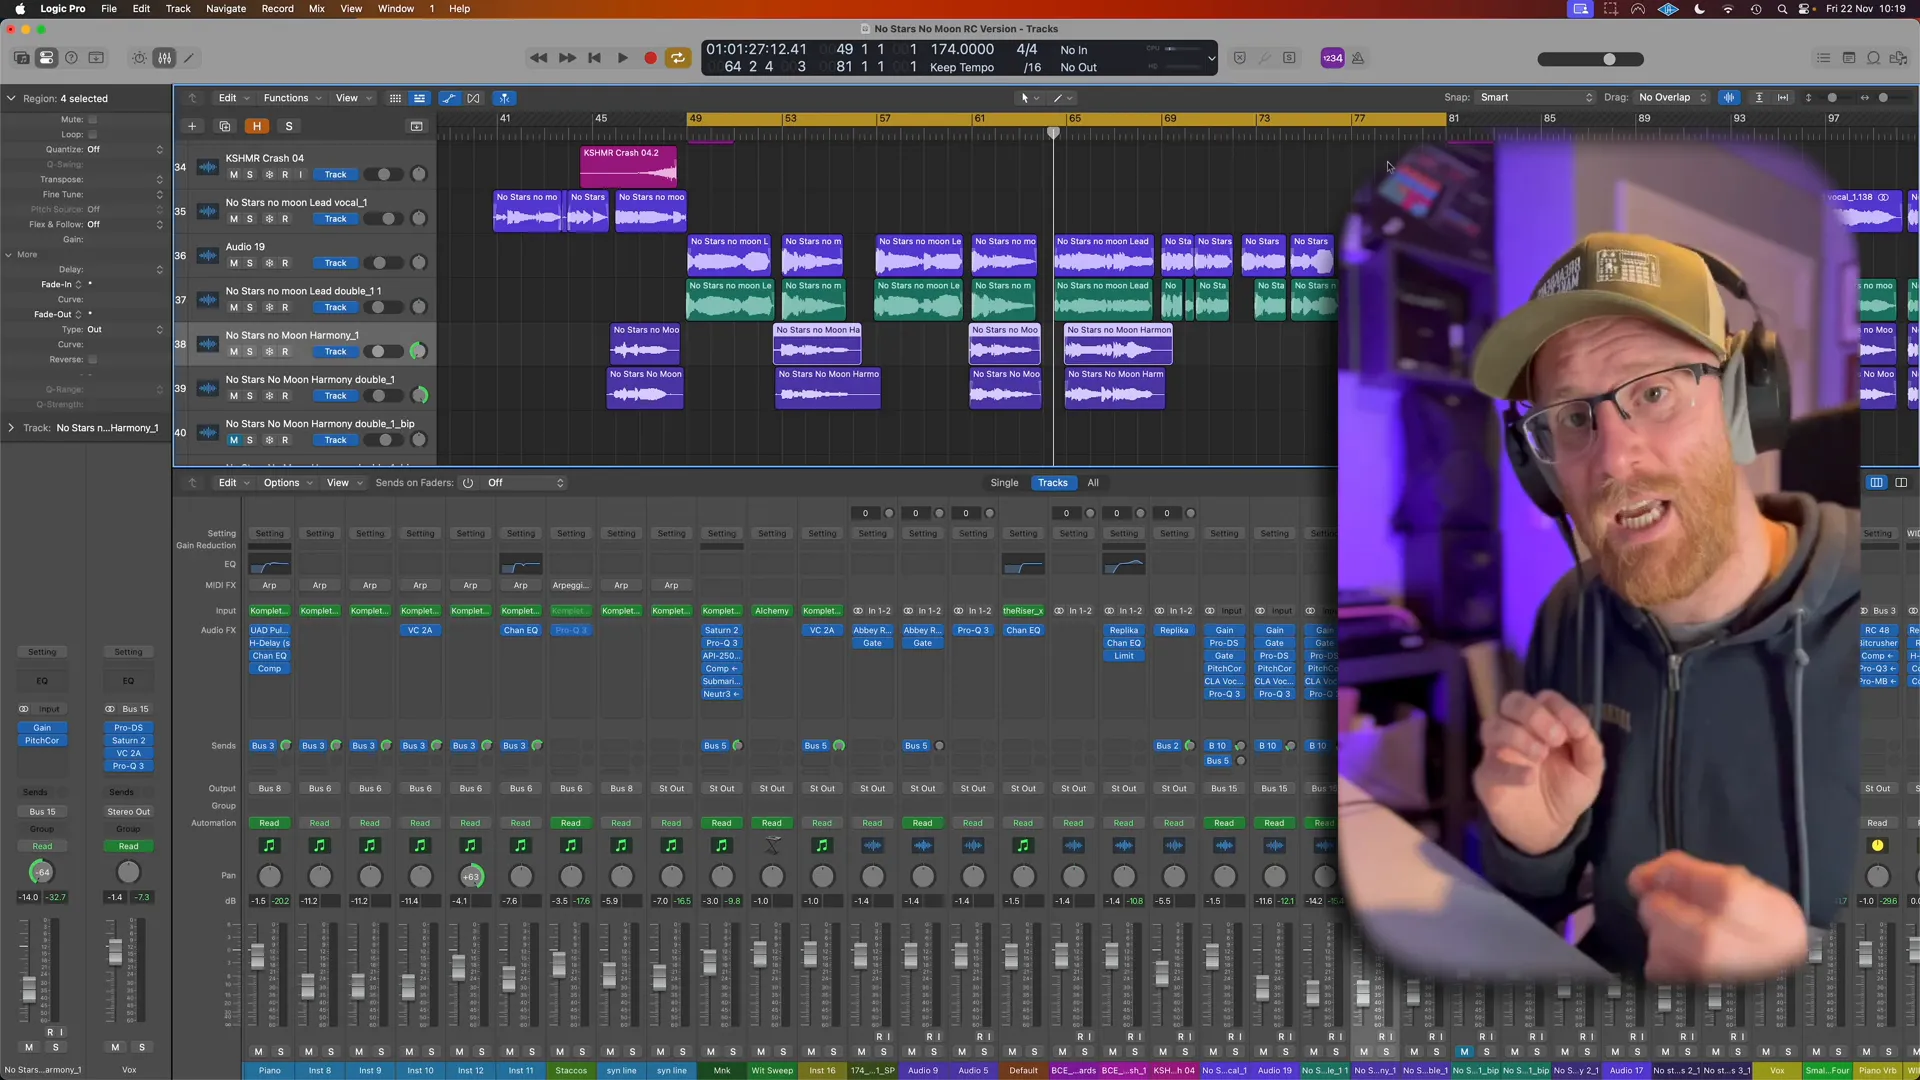
Step 8: Pitch Correcting Backing Vocals and Harmonies 🎤
When it comes to backing vocals and harmonies, the approach differs slightly from lead vocals. These elements often require a subtler touch. Start by applying the same pitch correction settings as the lead vocal, but consider lowering the response time to 40 milliseconds. This adjustment allows for a more blended sound.
It's important to ensure that harmonies complement the lead vocal without overshadowing it. For backing vocals, you can experiment with slightly detuning them or using a different key to create depth. This technique helps maintain the overall balance in your mix.

Step 9: Distributing Your Music 🎧
Once your vocals are polished and your track is ready, the next step is distribution. Utilizing services like DistroKid simplifies the process of getting your music onto major streaming platforms. DistroKid allows independent artists to distribute unlimited music at an affordable price.
To distribute your music, create an account with DistroKid, upload your track, and choose the platforms you want to release it on. Make sure to include all relevant metadata, including title, artist name, and genre. This ensures your music is properly categorized and easily discoverable by listeners.
For more in-depth guidance on music distribution, check out our blog on DistroKid Explained.
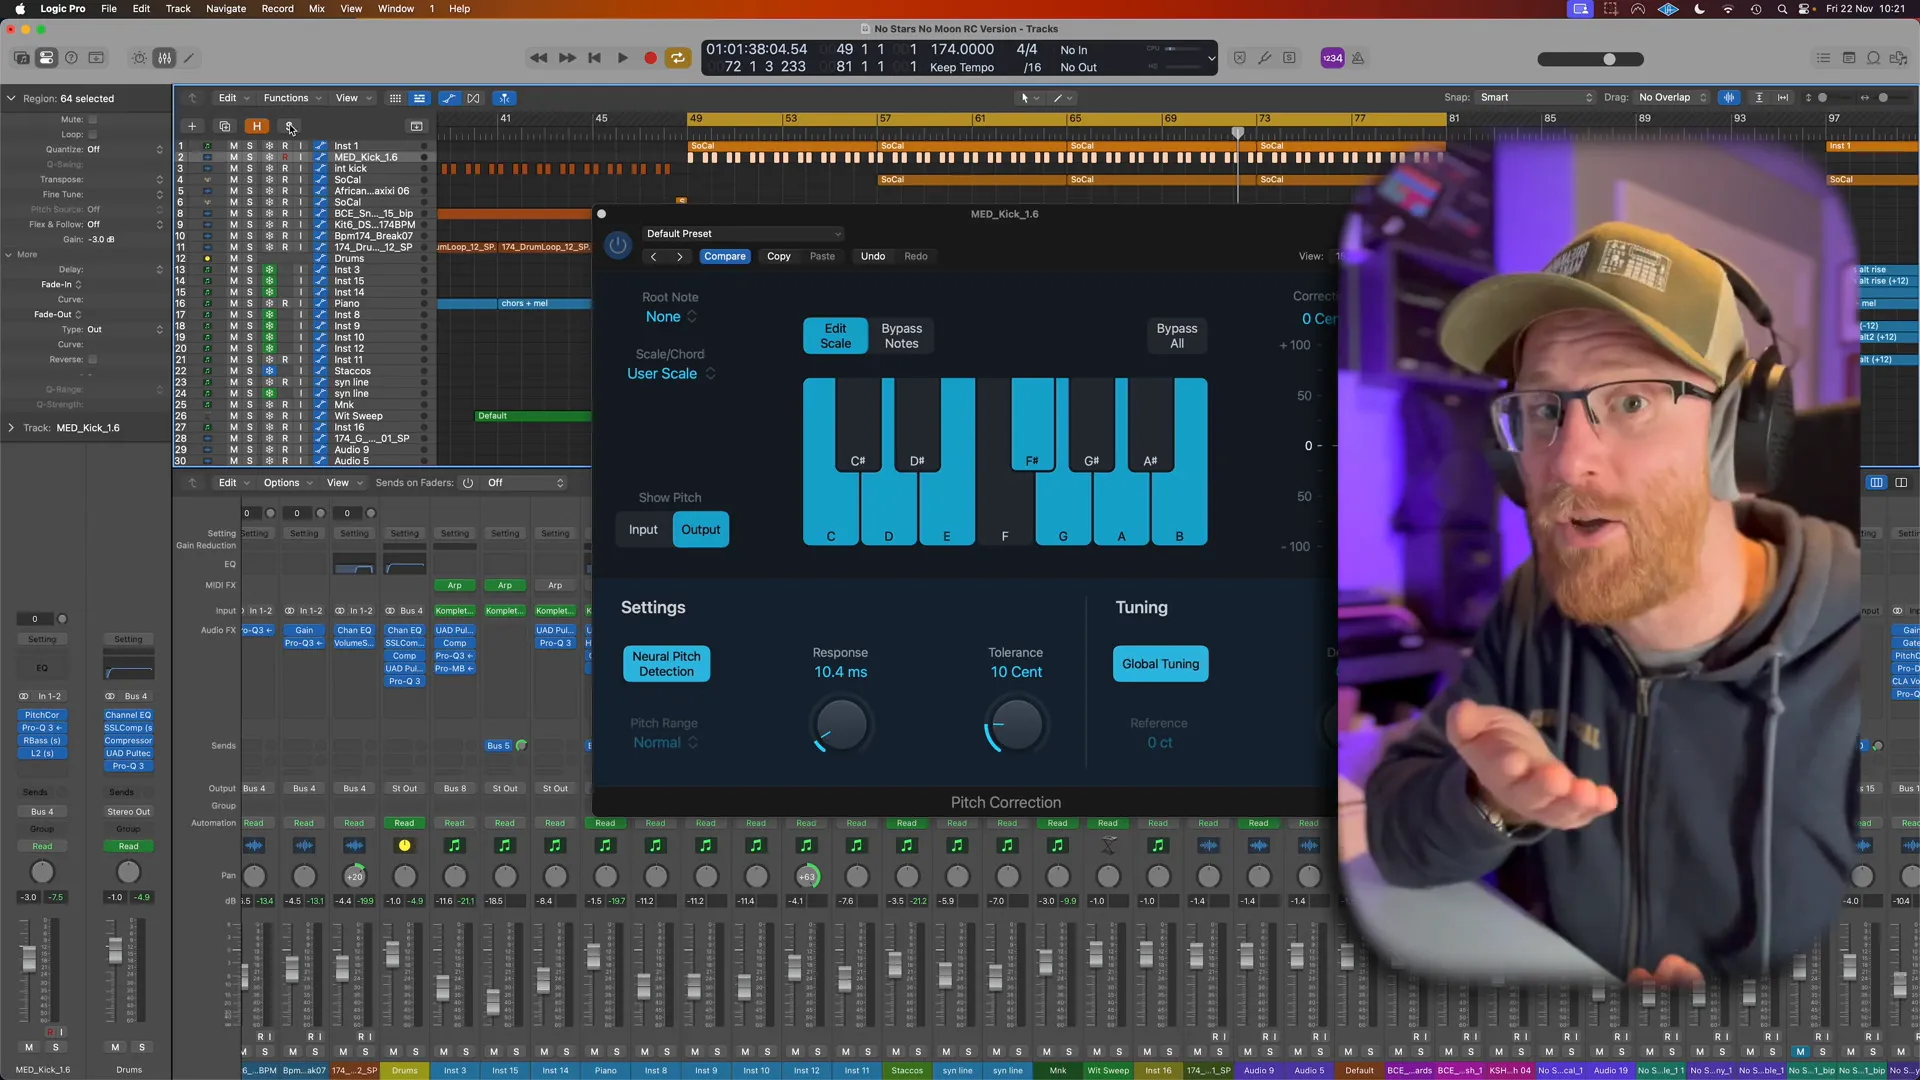
Step 10: Bonus Tip for Kick Drums 🥁
A unique trick for enhancing your kick drum is to use pitch correction. By applying autotune to the kick, you can adjust its pitch to fit the key of your track. Set the response time to around 10 milliseconds for quick transients, allowing the kick to punch through while still being in tune.
This technique can help your kick drum sit better in the mix and align with the overall harmonic structure of your track. It’s a subtle yet effective way to elevate your production quality.
FAQ: Common Questions about Logic Pro Autotune ❓
What is Logic Pro Autotune?
Logic Pro Autotune is a pitch correction plugin that allows users to correct vocal pitches in real-time. It can be used for subtle adjustments or to create the signature autotune sound.
How do I avoid a robotic sound when using autotune?
To avoid a robotic sound, adjust the response time to around 20 milliseconds and set the tolerance to about 10 cents. This allows for a more natural flow between notes.
Can I use autotune on instruments besides vocals?
Yes, autotune can be applied to any pitched instrument, including guitars, synthesizers, and even kick drums, to enhance their tonal quality and fit within the track's key.
What are the best practices for using autotune?
- Set the correct key for your track before applying pitch correction.
- Adjust response time and tolerance for natural-sounding corrections.
- Experiment with different settings for backing vocals and harmonies.
- Consider using autotune creatively for unique effects.
For more tips on mixing and mastering, check out our blog on Mastering Your Music and Mixing Vocals.


Comments
Post a Comment