Mastering Logic Pro Automation: Tips and Techniques
Automation in music production is a game changer, especially when using Logic Pro. It transforms flat tracks into dynamic soundscapes, allowing you to control various parameters like volume, panning, and effects. Let’s dive into the essential tips for mastering Logic Pro automation and make your mixes stand out!
Table of Contents
- 🔍 What is Automation?
- 🛠️ Types of Automation
- ✏️ Drawing Automation
- 🎶 Example: Adding Life to Your Track
- 📈 Recording Automation
- 🎤 Creative Effects with Automation
- 💡 Conclusion
🔍 What is Automation?
Automation refers to the process of controlling parameters in your music mix automatically. This can include gradually increasing the volume of a guitar solo, panning a synth from left to right, or changing the filter cutoff frequency of a synthesizer over time. The goal of automation is to enhance the emotional depth and movement in your tracks.
🛠️ Types of Automation
In Logic Pro, you’ll encounter various automation modes: Read, Write, Touch, and Latch. Understanding these modes is crucial:
- Read: The track reads the existing automation data.
- Write: Adjusts multiple parameters and writes them into automation lanes. However, this can overwrite other automation data, which can be cumbersome.
- Touch: Allows you to adjust a parameter, which returns to its previous state once you release the control.
- Latch: Similar to Touch, but it keeps the parameter at the last adjusted position until changed again.
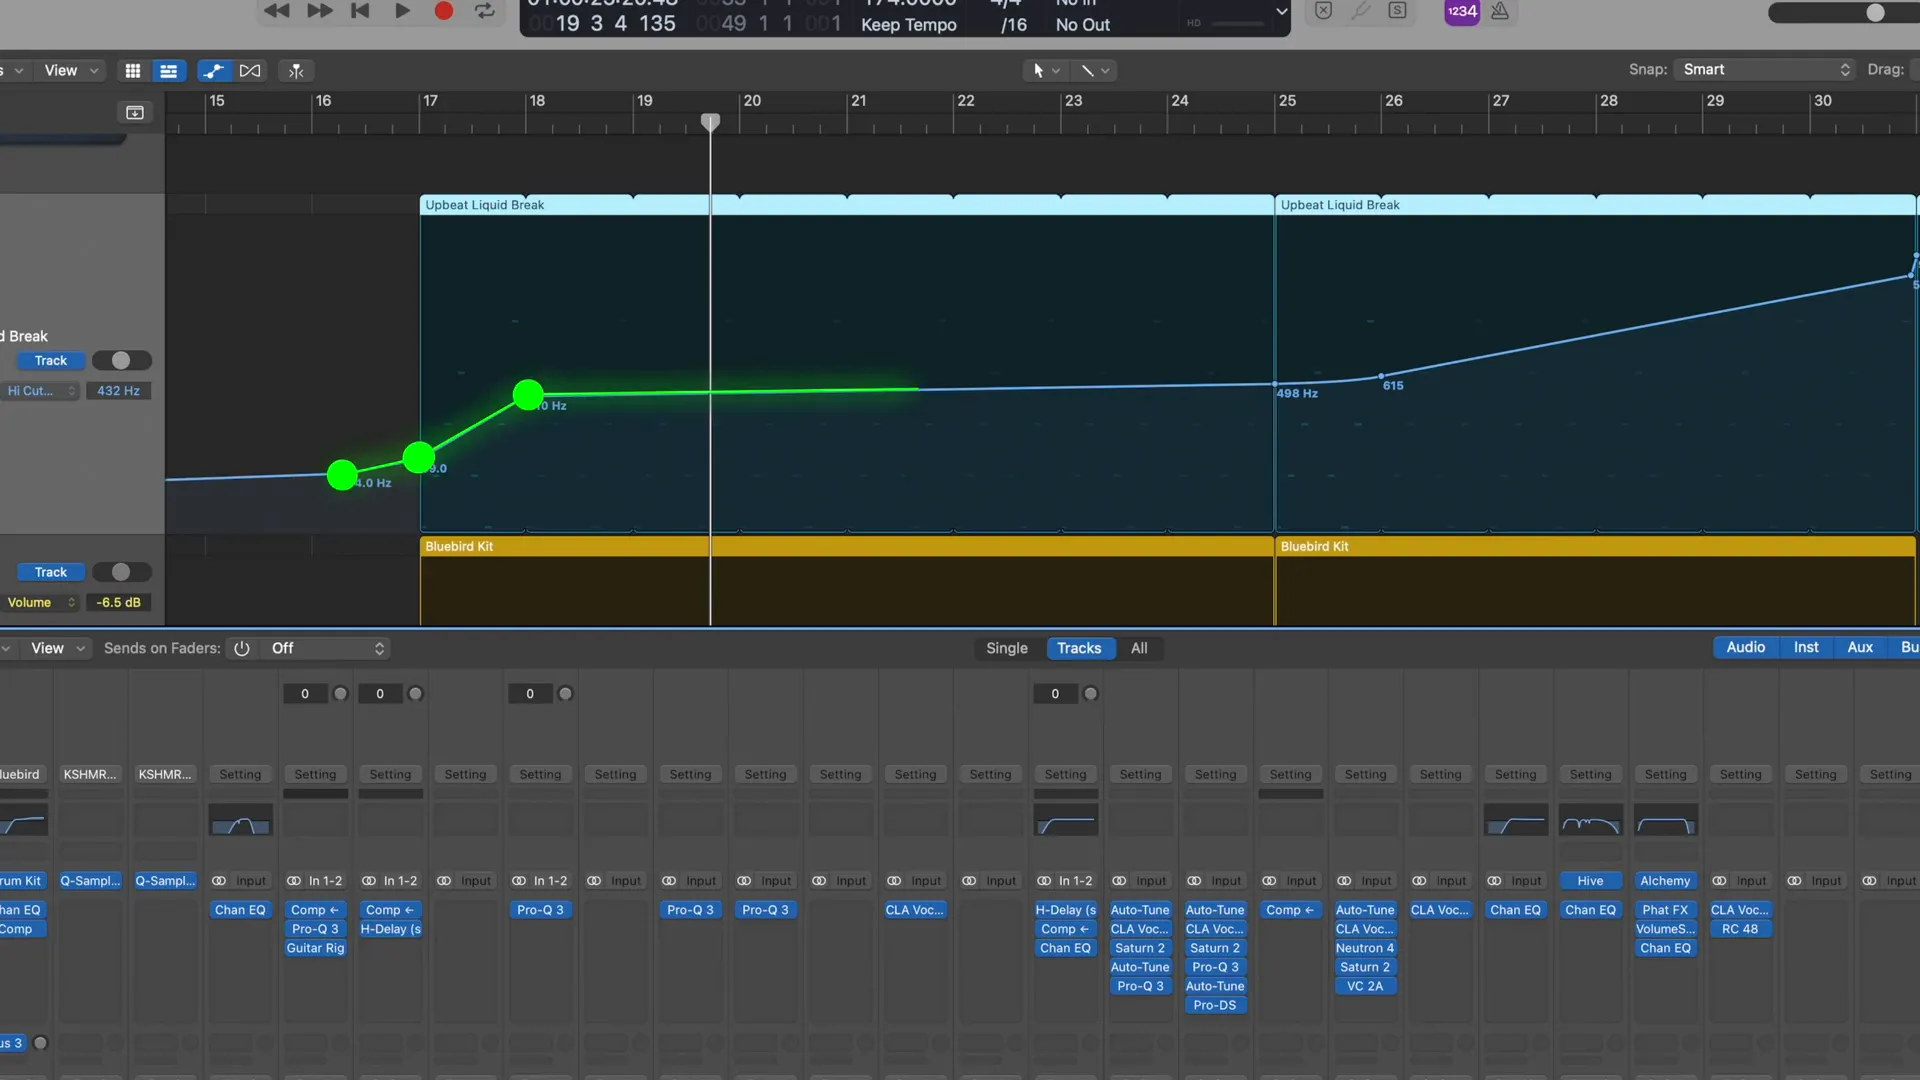
✏️ Drawing Automation
One of the simplest ways to implement automation is by drawing it in. You can use the pen tool to create two points on the automation lane, adjusting parameters between those points to add curves and shapes. This can bring life, movement, and depth to your track.
🎶 Example: Adding Life to Your Track
Let’s look at a practical example. Consider a track that starts with a built-up drum break. Here’s how it sounds without automation:
Now, when we apply automation, specifically filtering the high end of the EQ, we can bring the drum break in gradually. This builds anticipation and creates a more engaging listening experience.
📈 Recording Automation
Beyond drawing automation, you can also record it using a DAW controller. For instance, using a Mackie desk allows for real-time adjustments to volume, panning, or plugin parameters. However, remember that once you automate a fader, it may restrict your ability to adjust it freely later.
For example, if a guitar's volume is automated to dip from 0 dB to -6 dB, it allows for a smoother mix, preventing any overwhelming loudness at key moments.
🎤 Creative Effects with Automation
Automation can also be used for creative effects. For example, you can use a send to add reverb to vocal tracks dynamically. By automating the send level, you can create a lush reverb effect that enhances the vocal without overwhelming the mix.
💡 Conclusion
Automation is an essential tool for any music producer looking to enhance their tracks. By mastering the different types of automation and their applications, you can bring a new level of depth and creativity to your music. If you have any questions or need more tutorials, feel free to leave a comment below!
For more tips on music production, check out Courses — Warrior Sound or explore our Mastering Music Masterclass Info — Warrior Sound.


Comments
Post a Comment